Implementing a Wizard in C#
Oddly, the Windows Forms libraries don’t provide any support for writing wizards. Here’s one way to do it.
Update: Source code now lives at on GitHub; please post comments, issues, etc., there instead.
This is part one; part two (which includes source code) is here.
The design is based on the one I used for implementing a paged Options dialog. Essentially, each of the pages is implemented as a user control, and they live on a form.
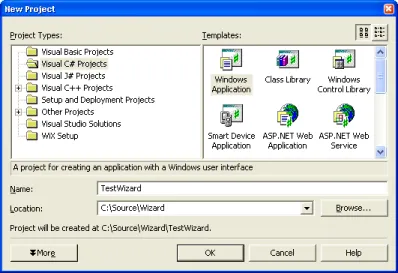
First, we start with a new C# application; this is our test app:
The first thing I tend to do with C# apps these days is move Main somewhere else, the way that Visual Studio 2005 does, so we’ll have a class called Program that looks like this:
using System;
using System.Windows.Forms;

namespace TestWizard
{
    public class Program
    {
        [STAThread]
        static void Main()
        {
            WizardSheet wizard = new WizardSheet();
            wizard.Pages.Add(new WelcomePage());
            wizard.Pages.Add(new MiddlePage());
            wizard.Pages.Add(new CompletePage());
            Application.Run(wizard);
        }
    }
}
Now we’ve got a Program.cs file, we don’t need the Form1.cs file, so we’ll delete it. Obviously, this won’t compile, because we’ve not implemented the WizardSheet class nor any of the pages.
The Wizard.UI Project
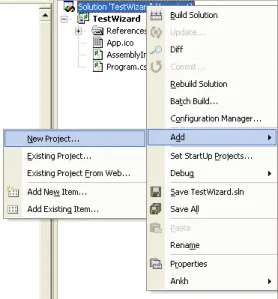
Our next step is to create a library project which will implement the wizard classes. Right click on the solution in Solution Explorer and select Add / New Project:
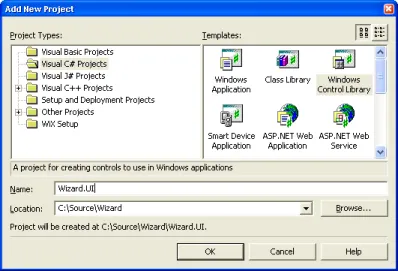
We want a Windows Control Library, called “Wizard.UI”:
By default, Visual Studio puts a custom user control into the project. We don’t want it, so we’ll delete it.
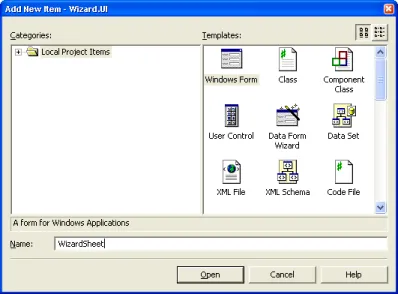
What we do want is a Windows Form, so we’ll create that. It’s called WizardSheet:
We need to fix up a few things before it’ll compile. First we need to add a reference from our TestWizard project to our Wizard.UI project, and then we need to add a “using” statement.
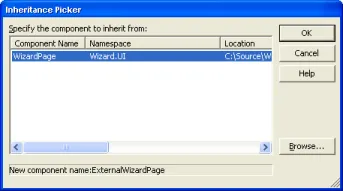
We also need to implement our 3 page classes. Our next step is to create the WizardPage class that they’ll be deriving from. More specifically, I’m going to be creating 3 new classes: the base WizardPage class, and ExternalWizardPage and InternalWizardPage . These two classes will be used for the first/last pages in a wizard and the middle pages respectively. By splitting it up like this, we’ll make it easier to implement proper Wizard97-style wizards.
WizardPage is a User Control class:
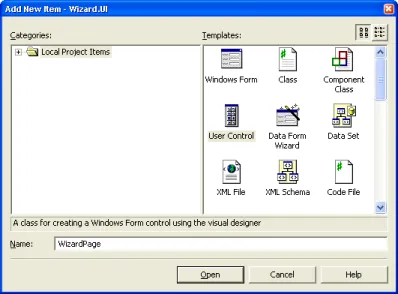
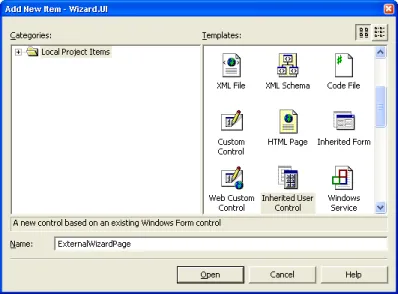
We don’t bother adding any UI elements to it, so we just end up with a boring grey square. The interesting UI will be added in the other two classes. We’ll add these as “Inherited User Control” classes:
Again, for the moment, we’ll leave these as boring grey squares. At this point, however, we can create our three missing WelcomePage, MiddlePage and CompletePage classes.
We add these to the “TestWizard” project as inherited user controls. WelcomePage and CompletePage inherit from ExternalWizardPage. MiddlePage inherits from InternalWizardPage.
Now we need to implement “Pages”, as in “wizard.Pages.Add”:
private IList _pages = new ArrayList();

public IList Pages
{
    get { return _pages; }
}
Hurrah. It compiles. Doesn’t do anything yet, though.
Adding The Buttons
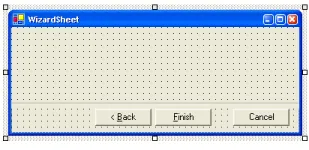
We need to put some buttons on the wizard. We need 4 buttons: Back, Next, Finish and Cancel. The Next and Finish buttons will be positioned on top of each other. To make them easier to manage, we’ll put them in a panel. This panel will be called buttonPanel, and is docked to the bottom of the form. Make it 40 or so pixels high.
The 4 buttons should have their Anchor property set to “Bottom, Right”. That should all look like this:
![]()
The Etched Line
It’s still a bit boring looking. Let’s spruce it up a bit by putting a nice etched line across the top of the button panel. We’ll need a new User Control. You can try putting the control in the same project, but I’ve found that the designer support is a bit wonky if you do this. We’ll create a new project, called Wizard.Controls. Again, it’s a Windows Control Library project.
This time, rather than delete Visual Studio’s new UserControl1.cs file, we’ll just rename it. Call it EtchedLine.cs, and rename the class it contains to EtchedLine. Build the new project.
Now, if we add a reference from Wizard.UI to Wizard.Controls, we can drop this new class onto our WizardSheet form. Specifically, drop it onto the page panel, set its height to 8 pixels and set it to dock to the top of the panel.
We’ll need to implement the drawing behaviour, which is easy:
Color _darkColor = SystemColors.ControlDark;
Color _lightColor = SystemColors.ControlLightLight;

protected override void OnPaint(PaintEventArgs e)
{
    base.OnPaint(e);

    Brush lightBrush = new SolidBrush(_lightColor);
    Brush darkBrush = new SolidBrush(_darkColor);
    Pen lightPen = new Pen(lightBrush, 1);
    Pen darkPen = new Pen(darkBrush, 1);

    e.Graphics.DrawLine(darkPen, 0, 0, this.Width, 0);
    e.Graphics.DrawLine(lightPen, 0, 1, this.Width, 1);
}
To get it to redraw properly when resized, we need to call Refresh:
protected override void OnResize(EventArgs e)
{
    base.OnResize (e);

    Refresh();
}
One small wrinkle is that we don’t want our control to appear in the tab order for the dialog, so we need to add a little snippet to our constructor:
public EtchedLine()
{
    // This call is required by the Windows.Forms Form Designer.
    InitializeComponent();

    // Avoid receiving the focus.
    SetStyle(ControlStyles.Selectable, false);
}
We’ll also make the colours editable in the designer. The defaults will generally be OK, though:
[Category("Appearance")]
Color DarkColor
{

    get { return _darkColor; }

    set
    {
        _darkColor = value;
        Refresh();
    }
}

[Category("Appearance")]
Color LightColor
{
    get { return _lightColor; }

    set
    {
        _lightColor = value;
        Refresh();
    }
}
Now, if we look at the form in the designer, it’s got a natty etched line running across it above the buttons:
Displaying the Pages
Of course, it still doesn’t display anything interesting. To display the pages, we’ll need another panel. This one is called pagePanel. It lives on the WizardSheet form and fills all of the space not used by the button panel.
We’ll use the same design as for the options dialogs linked above. The size of the form will be adjusted so that the page panel can fit the largest page.
Note that this means that your pages might be resized even if the wizard itself has a fixed border, so be sure to set the Anchor property on your controls properly.
This is implemented in the Load event:
private void WizardSheet_Load(object sender, System.EventArgs e)
{
    if (_pages.Count != 0)
    {
        ResizeToFit();
        SetActivePage(0);
    }
    else
        SetWizardButtons(WizardButtons.None);
}

private void ResizeToFit()
{
    Size maxPageSize = new Size(buttonPanel.Width, 0);

    foreach (WizardPage page in _pages)
    {
        if (page.Width > maxPageSize.Width)
            maxPageSize.Width = page.Width;
        if (page.Height > maxPageSize.Height)
            maxPageSize.Height = page.Height;
    }

    foreach (WizardPage page in _pages)
    {
        page.Size = maxPageSize;
    }

    Size extraSize = this.Size;
    extraSize -= pagePanel.Size;

    Size newSize = maxPageSize + extraSize;
    this.Size = newSize;
}
We’ll stub out the two missing functions:
public void SetActivePage(int pageIndex)
{
}

public void SetWizardButtons(WizardButtons buttons)
{
}
WizardButtons is an enum. It lives at namespace level:
[Flags]
public enum WizardButtons
{
    None = 0x0000,
    Back = 0x0001,
    Next = 0x0002,
    Finish = 0x0004,
}
That compiles, so we can get on with implementing the SetActivePage method:
public void SetActivePage(int pageIndex)
{
    if (pageIndex < 0 || pageIndex >= _pages.Count)
        throw new ArgumentOutOfRangeException("pageIndex");

    WizardPage page = (WizardPage)_pages[pageIndex];
    SetActivePage(page);
}

private void SetActivePage(WizardPage newPage)
{
    // If this page isn't in the Controls collection, add it.
    // This is what causes the Load event, so we defer
    // it as late as possible.
    if (!pagePanel.Controls.Contains(newPage))
        pagePanel.Controls.Add(newPage);

    // Show this page.
    newPage.Visible = true;

    // Hide all of the other pages.
    foreach (WizardPage page in _pages)
    {
        if (page != newPage)
            page.Visible = false;
    }
}
To check that that’s working properly, we need to throw a few controls on the three pages. A label control with the name of the page is fine.
OnSetActive
The next thing to do is to implement the Back, Next, Finish and Cancel buttons. We need to implement SetWizardButtons, and we probably ought to implement an OnSetActive method. Let’s start with OnSetActive, which requires some changes to the SetActivePage method as well:
private void SetActivePage(WizardPage newPage)
{
    WizardPage oldActivePage = _activePage;     // CHANGE

    // If this page isn't in the Controls collection, add it.
    // This is what causes the Load event, so we defer
    // it as late as possible.
    if (!pagePanel.Controls.Contains(newPage))
        pagePanel.Controls.Add(newPage);

    // Show this page.
    newPage.Visible = true;

    // CHANGE vv
    _activePage = newPage;

    // Allow the page to cancel this.
    CancelEventArgs e = new CancelEventArgs();
    newPage.OnSetActive(e);

    if (e.Cancel)
    {
        newPage.Visible = false;
        _activePage = oldActivePage;
    }
    // CHANGE ^^

    // Hide all of the other pages.
    foreach (WizardPage page in _pages)
    {
        if (page != _activePage)     // CHANGE
            page.Visible = false;
    }
}
Note that we allow the page to cancel the event.
Now we need to implement the OnSetActive function:
[Category("Wizard")]
public event CancelEventHandler SetActive;

public virtual void OnSetActive(CancelEventArgs e)
{
    if (SetActive != null)
        SetActive(this, e);
}
This way, the derived classes can either override the virtual function, or they can handle the event. Note that the event is put into a “Wizard” category. We’ll be adding other events to this category later.
The other thing we do at this point is add a [DefaultEvent("SetActive")] attribute to the class. This means that when you double-click on the page in the designer, it will automatically add a handler for the SetActive event and allow you to edit it.
Now we can test this by handling the event in our three page classes:
private void WelcomePage_SetActive(object sender,
    System.ComponentModel.CancelEventArgs e)
{
    SetWizardButtons(WizardButtons.Next);
}
The other pages are similar: MiddlePage has Back and Next buttons; CompletePage has Back and Finish buttons.
SetWizardButtons
We need to implement the WizardPage.SetWizardButtons helper function:
protected WizardSheet GetWizard()
{
    WizardSheet wizard = (WizardSheet)this.ParentForm;
    return wizard;
}

protected void SetWizardButtons(WizardButtons buttons)
{
    GetWizard().SetWizardButtons(buttons);
}
And we need to implement that WizardSheet.SetWizardButtons function:
internal void SetWizardButtons(WizardButtons buttons)
{
    // The Back button is simple.
    backButton.Enabled = ((buttons & WizardButtons.Back) != 0);

    // The Next button is a bit more complicated.
    // If we've got a Finish button, then it's disabled and hidden.
    if ((buttons & WizardButtons.Finish) != 0)
    {
        finishButton.Visible = true;
        finishButton.Enabled = true;

        nextButton.Visible = false;
        nextButton.Enabled = false;

        this.AcceptButton = finishButton;
    }
    else
    {
        finishButton.Visible = false;
        finishButton.Enabled = false;

        nextButton.Visible = true;
        nextButton.Enabled = ((buttons & WizardButtons.Next) != 0);

        this.AcceptButton = nextButton;
    }
}
Note that this code also sets the AcceptButton value, so that pressing Enter will press the right button.
Implementing The Next Button
When the user presses the Next button, we need to let the page know. By default, we’ll skip to the next page. However, the page can choose to go to a different page. In MFC, this is done by having the wizard page return the dialog ID of the page. Since WinForms doesn’t have dialog IDs, we’ll use the page’s name. We’ll also dress it up in nice .NET-style events.
It looks like this:
private void nextButton_Click(object sender, System.EventArgs e)
{
    // Figure out which page is next.
    int activeIndex = GetActiveIndex();
    int nextIndex = activeIndex + 1;

    if (nextIndex < 0 || nextIndex >= _pages.Count)
        nextIndex = activeIndex;

    // Fill in the event args.
    WizardPage newPage = (WizardPage)_pages[nextIndex];

    WizardPageEventArgs wnea = new WizardPageEventArgs();
    wnea.NewPage = newPage.Name;
    wnea.Cancel = false;

    // Tell the current page. It's allowed to choose a different page.
    _activePage.OnWizardNext(wnea);

    // Are we cancelling the event?
    if (wnea.Cancel)
        return;

    // Go to the new page.
    SetActivePage(wnea.NewPage);
}
First we figure out which page is next by default. Then we ask the current page to handle the event. It can cancel the event, in which case we’ll stay where we were, or it can nominate a different page to go to.
The WizardPageEventArgs.cs file looks like this:
using System;
using System.ComponentModel;

namespace Wizard.UI
{
    public class WizardPageEventArgs : CancelEventArgs
    {
        string _newPage = null;

        public string NewPage
        {
            get { return _newPage; }
            set { _newPage = value; }
        }
    }

    public delegate void WizardPageEventHandler(object sender, WizardPageEventArgs e);
}
We need to implement GetActiveIndex as well:
private int GetActiveIndex()
{
    WizardPage activePage = GetActivePage();

    for (int i = 0; i < _pages.Count; ++i)
    {
        if (activePage == _pages[i])
            return i;
    }

    return -1;
}

private WizardPage GetActivePage()
{
    return _activePage;
}
We need to implement the OnWizardNext function:
[Category("Wizard")]
public event WizardPageEventHandler WizardNext;

public virtual void OnWizardNext(WizardPageEventArgs e)
{
    if (WizardNext != null)
        WizardNext(this, e);
}
And we need to implement the overload of SetActivePage that takes a page name. It looks like this:
private WizardPage FindPage(string pageName)
{
    foreach (WizardPage page in _pages)
    {
        if (page.Name == pageName)
            return page;
    }

    return null;
}

private void SetActivePage(string newPageName)
{
    WizardPage newPage = FindPage(newPageName);

    if (newPage == null)
        throw new Exception(string.Format("Can't find page named {0}", newPageName));

    SetActivePage(newPage);
}
Note that sometimes, when you create a new wizard page, the Name property doesn’t take immediately. This appears to be a (minor) bug in the designer. If you make a change to the page, it seems to work OK.
Implementing the Back Button
As you’d probably expect, the code for the Back button is almost identical to the code for the Next button. So much so that we can do a little refactoring and end up with this:
private WizardPageEventArgs PreChangePage(int delta)
{
    // Figure out which page is next.
    int activeIndex = GetActiveIndex();
    int nextIndex = activeIndex + delta;

    if (nextIndex < 0 || nextIndex >= _pages.Count)
        nextIndex = activeIndex;

    // Fill in the event args.
    WizardPage newPage = (WizardPage)_pages[nextIndex];

    WizardPageEventArgs e = new WizardPageEventArgs();
    e.NewPage = newPage.Name;
    e.Cancel = false;

    return e;
}

private void PostChangePage(WizardPageEventArgs e)
{
    if (!e.Cancel)
        SetActivePage(e.NewPage);
}

private void nextButton_Click(object sender, System.EventArgs e)
{
    WizardPageEventArgs wpea = PreChangePage(+1);
    _activePage.OnWizardNext(wpea);
    PostChangePage(wpea);
}

private void backButton_Click(object sender, System.EventArgs e)
{
    WizardPageEventArgs wpea = PreChangePage(-1);
    _activePage.OnWizardBack(wpea);
    PostChangePage(wpea);
}
Don’t forget to implement OnWizardBack.
Implementing the Finish Button
Easy:
private void finishButton_Click(object sender, System.EventArgs e)
{
    CancelEventArgs cea = new CancelEventArgs();
    _activePage.OnWizardFinish(cea);
    if (cea.Cancel)
        return;

    this.DialogResult = DialogResult.OK;
    this.Close();
}
The OnWizardFinish method is implemented as you’d expect.
After all that, we end up with a working wizard:
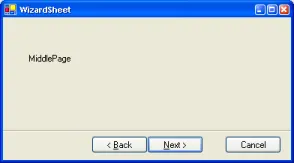
Note that I’ve turned on visual styles for the application, and I’ve moved the Back button a bit closer to the Next button.
In the next installment, we’ll fix a few things, and make it a lot prettier. Also, there’s source attached to that page.